Trick to Make Your Peace Lily Grow Unstoppably (And What Sellers Won’t Tell You)

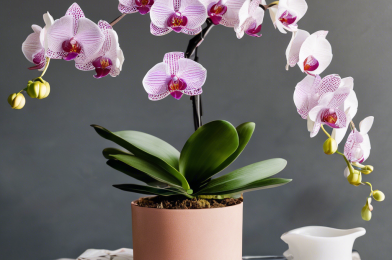
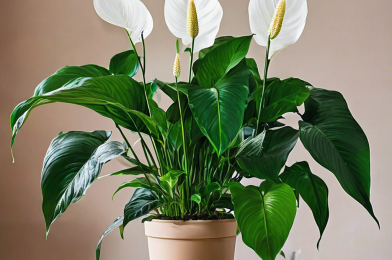
Are you a plant enthusiast looking for the perfect houseplant that’s easy to care for and adds a touch of greenery to your space? Look no further than the Peace Lily! With its elegant white flowers and lush green foliage, this tropical beauty is not just eye-catching but also incredibly resilient. But here’s the catch—there’s a little-known trick to make your Peace Lily flourish, and it’s not something plant sellers often reveal. So, let’s dive into the secrets of nurturing this plant and creating the perfect environment for its unstoppable growth.

The Peace Lily, scientifically known as Spathiphyllum, is a tropical plant native to the rainforests of Central and South America. Its ability to thrive in low light conditions and purify indoor air makes it an extremely popular houseplant. However, many plant lovers often find themselves wondering why their Peace Lily isn’t blooming or growing as expected. The answer lies in understanding the plant’s natural habitat and replicating those conditions.

To unlock the full potential of your Peace Lily’s growth, the key is to mimic its tropical rainforest environment. These plants thrive in warm and humid conditions with indirect sunlight. While they can tolerate low light, they will grow faster and bloom more frequently with brighter, indirect light. Imagine the dappled sunlight filtering through the canopy in a rainforest—that’s the ideal lighting condition for your Peace Lily.

Now, here’s the secret weapon: a simple trick to increase humidity around your plant. Place your Peace Lily on a tray filled with gravel or pebbles and water. As the water evaporates, it will create a humid microclimate that your plant will love. Just ensure the plant’s roots aren’t sitting in water to prevent root rot. Regular misting of the leaves can also help maintain humidity and keep the foliage clean and dust-free.

When it comes to watering, the Peace Lily prefers a good soak followed by a period of slight dryness. A thorough watering once a week is usually sufficient, but always check the top inch of soil before watering. The soil should be kept moist but never soggy. Overwatering is a common mistake, so it’s better to underwater than risk root rot.

Fertilizing your Peace Lily every month during the growing season with a balanced houseplant fertilizer will provide the necessary nutrients. Repotting should be done every two years or when you notice roots poking out of the drainage holes.

Revive Your Orchid Instantly: The 1-Drop Trick That Restores Any Plant’s Life

Revive your beloved orchid with a simple and effective technique that will have it thriving in no time! Many plant enthusiasts have discovered this ingenious trick, and now you can unlock the secret to transforming your wilted orchid into a vibrant, flourishing beauty. Say goodbye to the days of worrying about your plant’s health and hello to a green thumb!

The secret lies in a single drop of a magical elixir—hydrogen peroxide. Orchids, like many other houseplants, can suffer from root rot, a common issue caused by overwatering or poor drainage. This can lead to a decline in the plant’s overall health and eventually, its demise. But fear not! The 3% hydrogen peroxide solution, easily found at any pharmacy, acts as a powerful remedy. Its antiseptic properties combat fungal infections, while its oxygen-rich composition provides a much-needed boost to the roots.
**How to perform the 1-Drop Miracle:**
1. Gently remove your orchid from its pot, taking care not to damage the roots.
2. Carefully inspect the roots. Healthy roots should be firm and white or light gray in color. If you spot mushy, dark roots, it’s time to take action.
3. Using a clean pair of scissors or pruning shears, trim away the affected roots. Be precise and ensure you only remove the damaged portions.
4. Now, it’s time for the magic drop. Mix 1 part hydrogen peroxide with 1 part water, and with a clean pipette or dropper, apply a single drop to the trimmed areas.
5. Replant your orchid in fresh, well-drained potting mix, ensuring it’s positioned at the same depth as before.

The benefits of this technique are twofold. Not only does the hydrogen peroxide aid in healing the orchid’s roots, but it also stimulates new root growth. This encourages the plant to flourish and promotes the vibrant production of flowers. Say goodbye to the days of watching your orchid struggle and welcome a new era of lush growth and vibrant blooms.

The beauty of this method is its simplicity and effectiveness. You don’t need to be a master gardener to revive your orchid; this easy-to-follow process is accessible to all plant lovers. So, don’t let a struggling orchid dampen your spirits. With this 1-drop trick, you can become an orchid revival expert, saving not only your plant but also your peace of mind. Happy gardening!